
Getting started
Welcome to DIY! DIY is a cloud-based platform for assembling custom API flows simply, enabling data connectivity for your internal and external business needs.
Introduction
Using DIY, you can connect data sources -- such as web APIs and databases -- and expose data models, through secure, RESTful APIs. You can create a seamless flow from one API to the next, passing data along as you go. You can also manipulate the data before it reaches its destination using a graphical drag and drop interface. Once you have configured your flow, it appears to your customers as a single API, which they can access using state-of-the-art API documentation.
You can expose the data models hosted on your own database servers, or create new data models in DIY to be hosted in the DIY cloud.
What you need
DIY uses a web interface and cloud hosting, so there is nothing for you to install. All you need to get started is a user account. See DIY for administrators for more details.
How it works
To assemble an API, you need to configure each connector in your flow, as follows:
- Create the data source (API, database or storage connector).
- Specify details of the data model(s) associated with your data source.
- Enable user access to the data model(s).
Check out our video tutorials for a detailed demonstration of how to configure each connector type.
DIY comes with out-of-the-box functionality providing everything you need to assemble simple APIs. If you want to make your API more complex, however, DIY also provides the tools you need to extend it -- see DIY for developers for an overview of how to add some extra configuration to your API.
Create the data source
Repeat these steps for each of the data source connectors in your API.
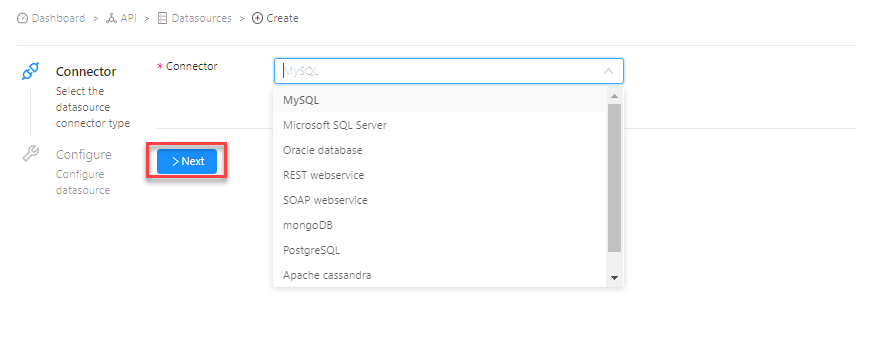
- In the API menu, select Datasources, then click
 .
.

- Select the data source connector type from the drop-down list and click Next.
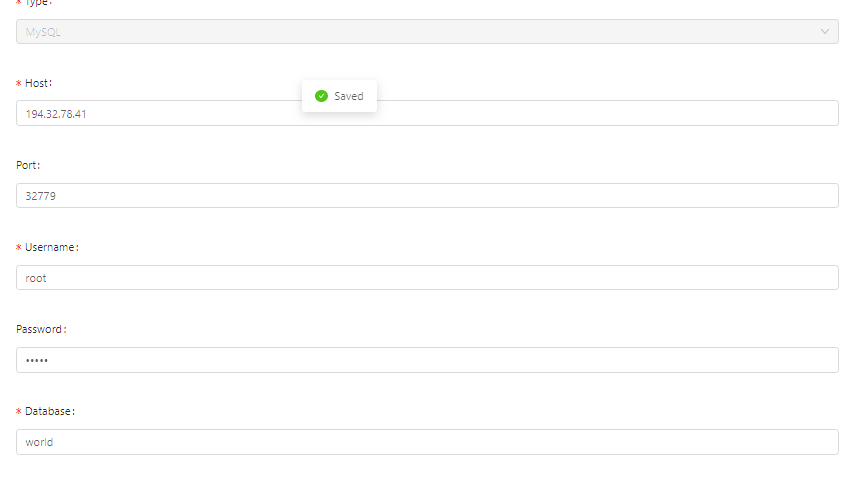
- Enter the data source name (which must be unique and contain no spaces), then complete the other details of the data source configuration either in the Form tab or the Editor tab. The fields available depend on the type of data source specified.
| Connector type | Details to specify |
|---|---|
| Database (mySQL, Oracle, etc.) | Host server/port, user credentials and database name |
| REST webservice | List all the endpoints you need, including URL, method, parameters, etc. |
| SOAP webservice | URL and WSDL |
| Storage connector | Storage provider details, including host server/port, user credentials and root folder |
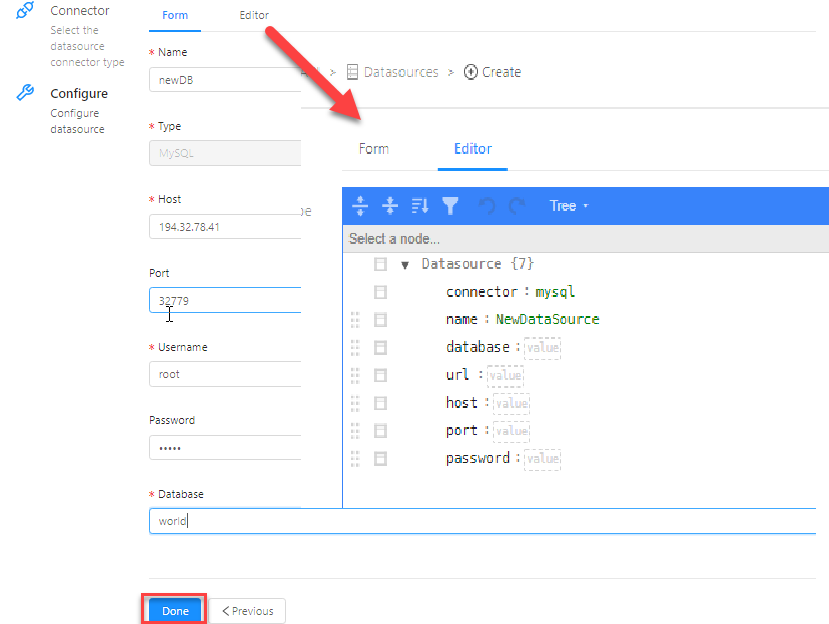
- Click Done. DIY tests the data source connection and any errors are reported.
Declare the data model
When you create a new database type data source, you need to specify details of the data model to be associated with it for this API connector. You do this by using the Discover feature to find any associated schemas, then updating the chosen schema as required. Note that as MongoDB databases do not have a database schema, you need to create a new model for them configured in a specific way. See the steps below for more details.
DIY automatically creates a data model for web service type data sources. You can use the Edit feature to view and edit data models associated with web service data sources.
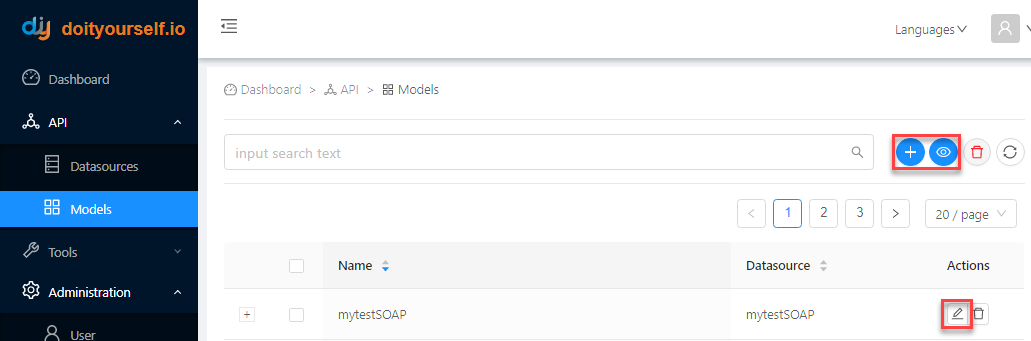
- In the API menu, select Models.
- If you are:
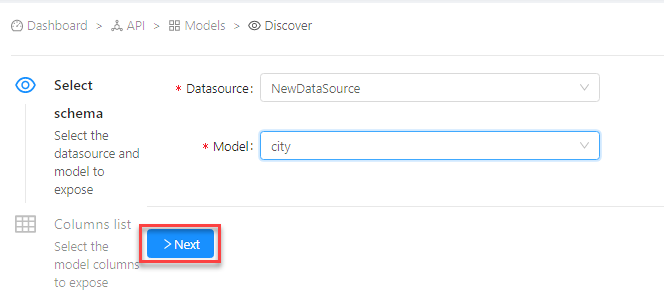
- connecting a remote data model (database data sources, apart from MongoDB), click Discover
 , then proceed to step 3
 - editing an existing data model (REST or SOAP data sources, or other general data model updates), click Edit
 next to the data model in the list, then proceed to step 4
 - creating a new data model (MongoDB data sources), click New , then proceed to step 4
- If you clicked , select the data source and the model from the list (which is automatically populated by DIY with the available schemas based on the selected data source). Click Next.
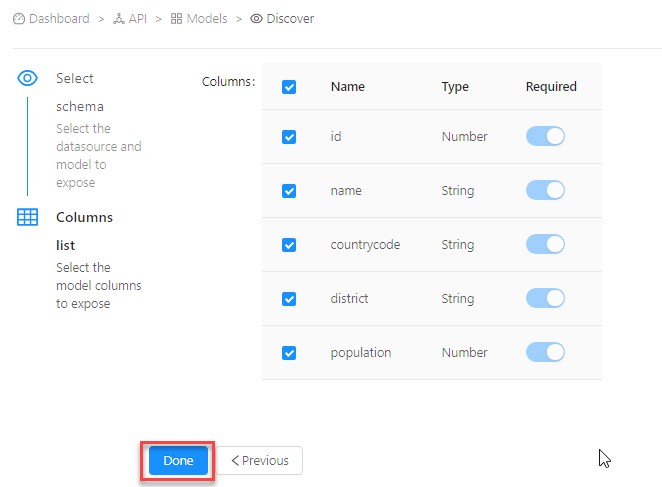
DIY displays the list of columns in the schema. Uncheck any columns you do not require and click Done.
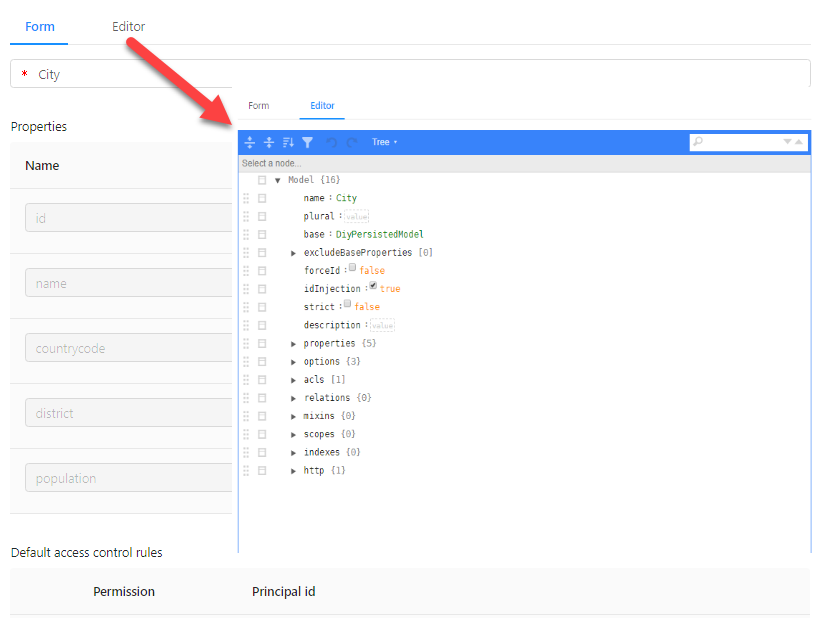
- Update the details of the model in the Form or the Editor tab, if required.
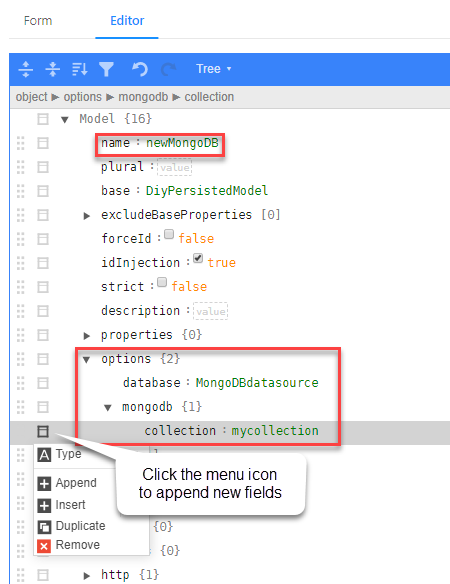
For MongoDB databases, you need to click the Editor tab and add the values shown in the following example. You can add the new fields in the options section using the editor's Append feature. Note that the database name must match the name you specified for your MongoDB data source and the collection must be a collection that exists in the MongoDB database.
- Enable user access to your new model in the Default access control rules section, by selecting the type of user from the list and toggling the permission button to Allow. You can also click Add access control rules if you want to add more rules. Note that if you require more specific access control rules, you can create them using the Access control rules function.

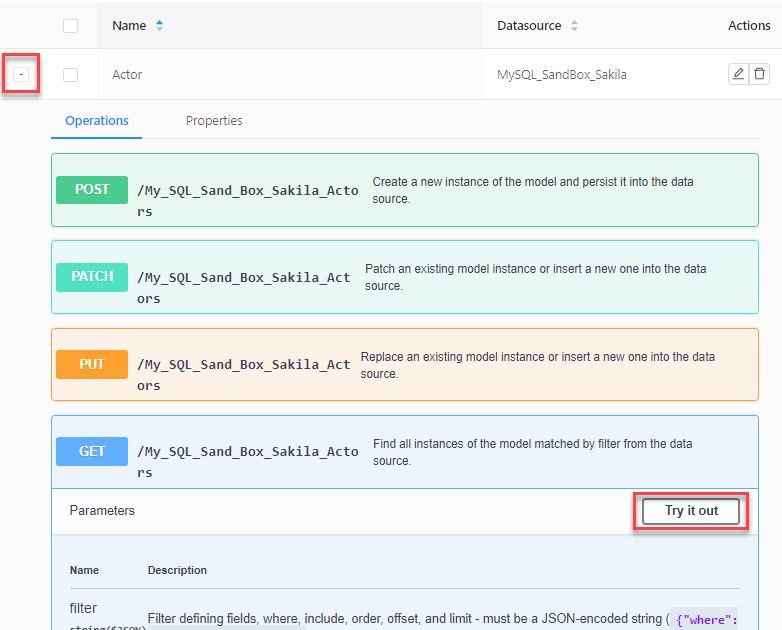
- Click Save. On the main Models page you can now click next to your new model in the list to expand it and view the endpoints which have been created for it. You can also expand each endpoint by clicking on it, and test the endpoint by clicking Try it out.
Share the API
- To share your API with customers and other end users, create a new user account with the appropriate user permissions.
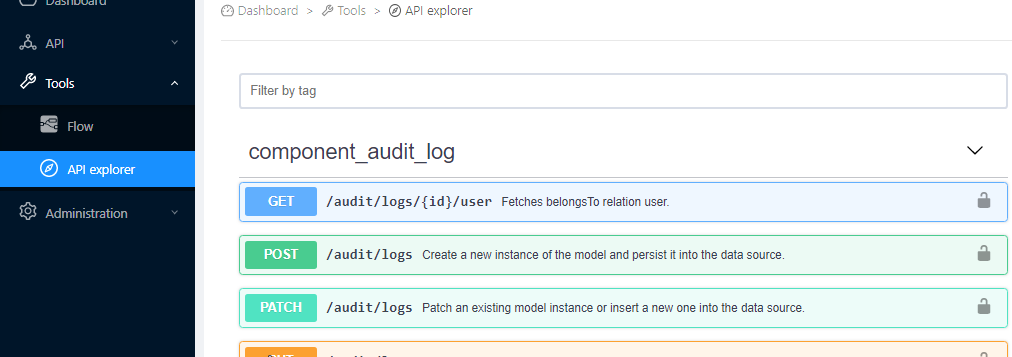
- Once you have granted the appropriate permissions, you can share your DIY URL with your customers. Customers with API explorer permissions will be able to view and try out your API endpoints directly in the DIY API explorer.
Your customers can also access your API by means of a third-party application. See Third-party client application administration for more information.